Adventure School participates in the Amazon Services LLC Associates Program, an affiliate advertising program for sites to earn advertising fees by advertising and linking to amazon.com
According to the 2017 Accidents in North American Climbing, 26% of all climbing-related accidents occur on the descent and 4% of all North American climbing accidents happen while rappelling. That’s not a huge number, but oftentimes rappelling related injuries are severe or fatal. Additionally, most all rappelling accidents are preventable with the right knowledge and skills.
What is rappelling
Rappelling is simply descending from a height using a rope and is an essential skill for various vertical ventures such as rock climbing, mountaineering, caving, or canyoneering.
Any adventurer should be competent in rappelling in various situations. Being a confident rappeller will open up many adventures that may seem too scary or dangerous otherwise.

How to rappel
Rappelling, just like so many other skills, is highly situational. The principles applied will always be the same, but the actual steps or procedures used will look different in every unique situation. Judging the terrain, skills of the team, weather, equipment, and other variables will dictate how to rig and execute a rappel. We won’t go over every nuance of rappelling here, but we’ll cover the main principles that – if followed – will greatly reduce your risk of becoming a rappelling statistic.
Let’s jump in at the top of a cliff. Whether we got here by climbing up from below or are lowering down, the same general sequence will apply.
Here’s a video I made of a canyoneering sequence you may see in canyoneering.
Setting up the anchor
Before you step up to the edge of the cliff, rig a safety tether to avoid mishaps at the cliff’s edge.
Safety tether
To safely rappel you’ll need to construct an anchor. This often requires you to get too close to the edge for comfort. Many accidents happen at the top of cliffs while rigging anchors. The easy way to avoid this is by rigging a safety tether.
To rig a safety tether, simply find a secure object, such as a tree or a rock, well away from the edge of the cliff. Tie a length of rope or webbing around the object and secure the other end to your harness using a personal anchor system so you can get right up to the edge of the cliff without falling off.
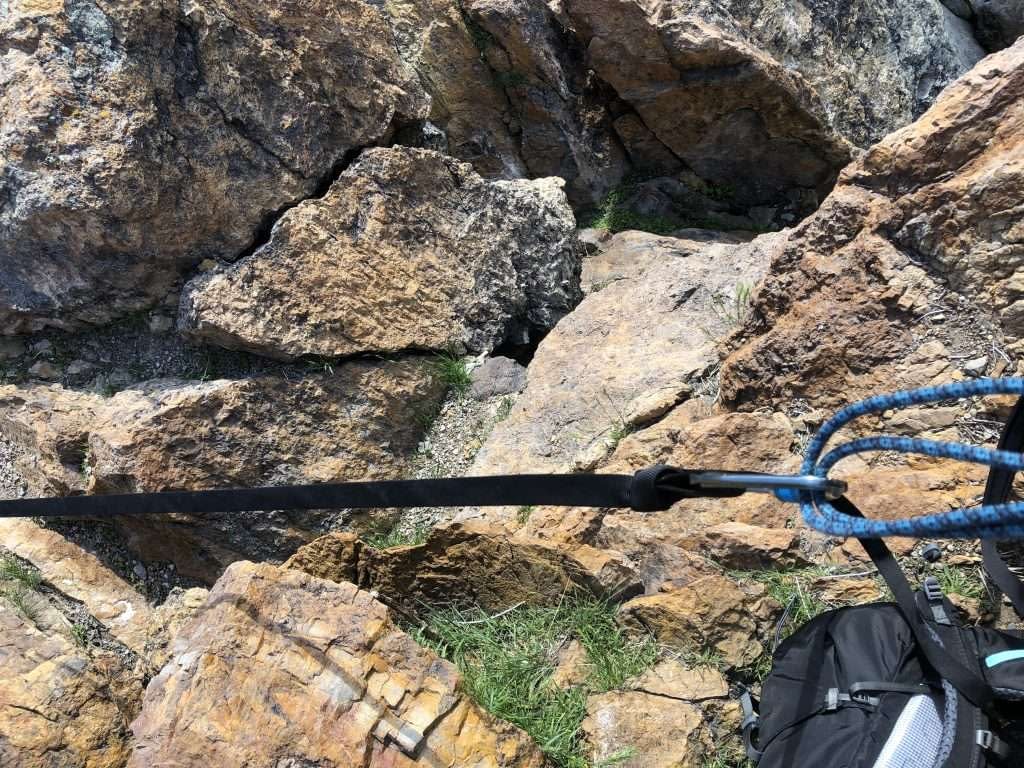
With this safety tether, you can now work safely on the edge of the cliff to build your rappelling anchor without risking a misstep that could end your day in a bad way.
Construct the rappelling anchor
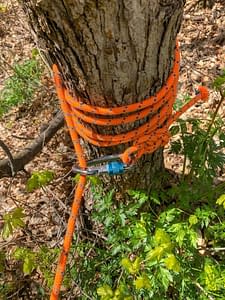
If you don’t already have an anchor rigged from rock climbing up from below, you’ll need to rig one to get down.
Anchor building is a complete skill in and of itself that we won’t spend too much time on here. The principle of anchor building that will keep you safe rappelling is that an anchor must be strong, secure, and simple. It’s easier to start a rappel if the anchor is positioned above your waist and a bit back from the edge of the cliff.
If you’ll need to pull the rope once you get to the bottom consider how the anchor position will impact your ability to pull the rope. Is the rope going to drag or will you have a clean pull? It’s better to have a hard start than it is to not be able to retrieve your rope.
Read more about anchors here or here
Once you get the anchor securely built, you can clip your personal protection to the anchor and remove the safety tether.
Rig your rope

Once you have a strong, secure, and simple anchor rigged, you can set up your rope for the rappel.
Depending on what activity you’re doing, (mountaineering, canyoneering, etc.) the rappelling scenarios will look a bit different. For rock climbing, the most common scenario will be that you’re rappelling to the ground from the top of a route or you’re rappelling down a multi-pitch climb one pitch at a time.
For these scenarios, you’ll most frequently be using a double-stranded rappel so we’ll discuss that scenario in detail. Plenty of other scenarios exist and although the details are different, the same general principles apply.
To rig your rope for rappelling, connect the rope to the anchor at the middle point of the rope or run it through the chains until at the midpoint. It helps to have your rope marked at the middle for this. Once you find the middle you can use chalk to mark it if you have multiple raps to complete. If both ends of the rope are visibly touching the ground, you don’t need to find the exact middle.
Tie a knot in the tails of the rope
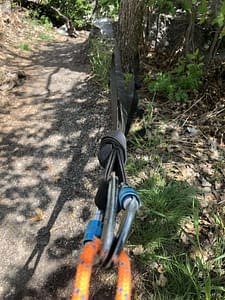
If you’re unsure that both ends are touching the ground or if you’re rappelling to the next anchor station on a multi-pitch, tie a knot at each end of the rope. I like to tie a figure eight on a bight with at least a 4-inch tail. I like to leave a much longer tail after these knots if I have enough rope so that there’s rope to work with if something isn’t right at the landing.
This knot ensures you don’t rappel off the end of the rope. Many unfortunate scenarios have resulted from climbers not tying knots in the end of their rappel ropes. Don’t become one of them.
Rope Management
To complete a successful rappel, you’ll need both sides of the rope to drop cleanly down to the ground or the next anchor station. Ensure as you rig your rope that there are no knots, tangles, or other obstructions preventing a clean rappel from top to bottom. If you hit a knot while rappelling you’ll end up wasting more time and energy fixing it while on rappel than if you fixed it before starting.
In windy conditions, ropes can blow around and snag on various features. It’s usually better in windy conditions to saddlebag the rope as you descend or to lower the rope down from above rather than throwing it. Some people connect the ends of the rope to their harness so the rope doesn’t blow around and get stuck.
Once you get your rope rigged through the anchor and have both ends touching the ground or tied off, it’s time to connect the rappel device to the rope.
Rigging the rappel device
Setting up your rappel device before you let gravity take over is simple, but if not done perfectly, it can lead to trouble. Gravity doesn’t discriminate. It’s trying to kill all of us
If you’re performing a double rope rappel, pick up both sides of the rope and give yourself a few feet of slack. On long rappels, the rope can be quite heavy so I like to gently pinch the rope against the ground with my foot to hold the weight (there’s always an exception and this may be the only exception to the not-stepping-on-the-rope rule).
With your belay device properly connected to your belay loop with a locking carabiner, take bights of both ropes in your hand and push the ropes through the slots on your belay device.
Clip both bights of rope through the carabiner and lock the carabiner.
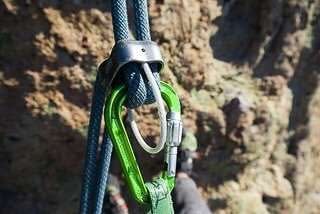
Depending on what type of belay device you’re using, these instructions may vary. Be sure to read and understand the instructions for rigging whatever belay device you use.
Backing up your rappel
Because risk abounds in the vertical world, we do all we can to mitigate it. One risk to consider is that when on rappel, the only thing keeping you from plummeting to the ground is your firm hold on the brake rope. Many situations could cause you to lose control of the brake line so wisdom dictates that we build in some redundancy here.
I’ll tell you straight up that there are no perfect ways to back up a rappel, but there are a few that are tried and true. We’ll start with the prusik or “third hand”.
How to rig a prusik or autoblock backup
A prusik is a small loop of 5-7mm cord tied with a double fisherman’s bend. You can buy these presewn as well like this one:
With a carabiner clipped to the belay loop, you’ll rig the prusik or autoblock below the belay device on the brake strand of rope. The belay device should be adequately extended to ensure the autoblock or prusik doesn’t get close to the belay device or the autoblock won’t work.
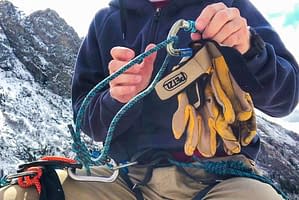
Start by clipping the prusik loop to the carabiner and then wrap it several times around the brake strand of the climbing rope. This will work for double or single-strand rappels. Be sure the wraps are neat and organized with each one stacked on top of the others. Sloppy prusiks don’t work properly.
Clip the loop back to the carabiner and lock the carabiner.
Put some weight on the rope to extend the prusik. At full extension, the prusik should lock on the rope and hold your weight and should not be too close to the belay device. If your prusik isn’t fully locking you need to add more wraps. If your prusik is within a few inches of the belay device, you need a shorter prusik or you need to extend the belay rigging.
Learn how to extend a rappel here
Rigging a prusik is not something you should be doing for the first time at the top of a rappel. This should be all figured out at home or at camp. Prusiks can be finicky but properly configuring the length of your loop for the rope you’ll be using both in double and single-strand setups will save you time and give you confidence when you’re out on the wall.
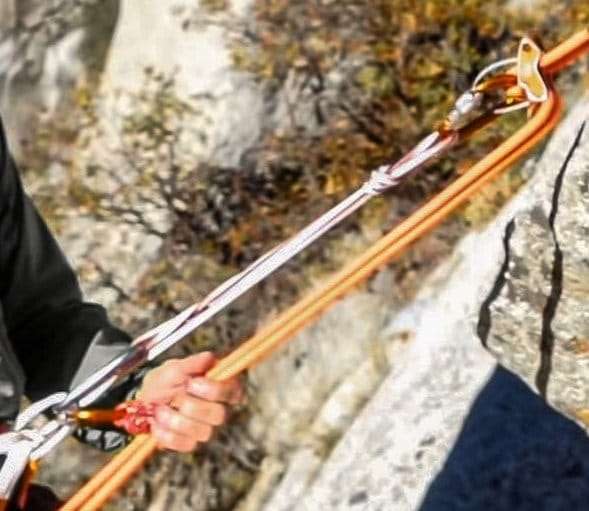
With the prusik in place, you have redundancy in your brake hand. If you happen to let go or lose control, the prusik will lock on the rope and prevent catastrophe. Prusiks aren’t the only method to back up your rappel. A much simpler and more reliable backup is the fireman’s belay. I only use the prusik or autoblock if I’m the first person down the rappel. All other times, I use a fireman’s belay.
How to perform a fireman’s belay
A properly performed fireman’s belay is a reliable way to stay safe while on rappel. It takes two people with one at the bottom of the rappel.
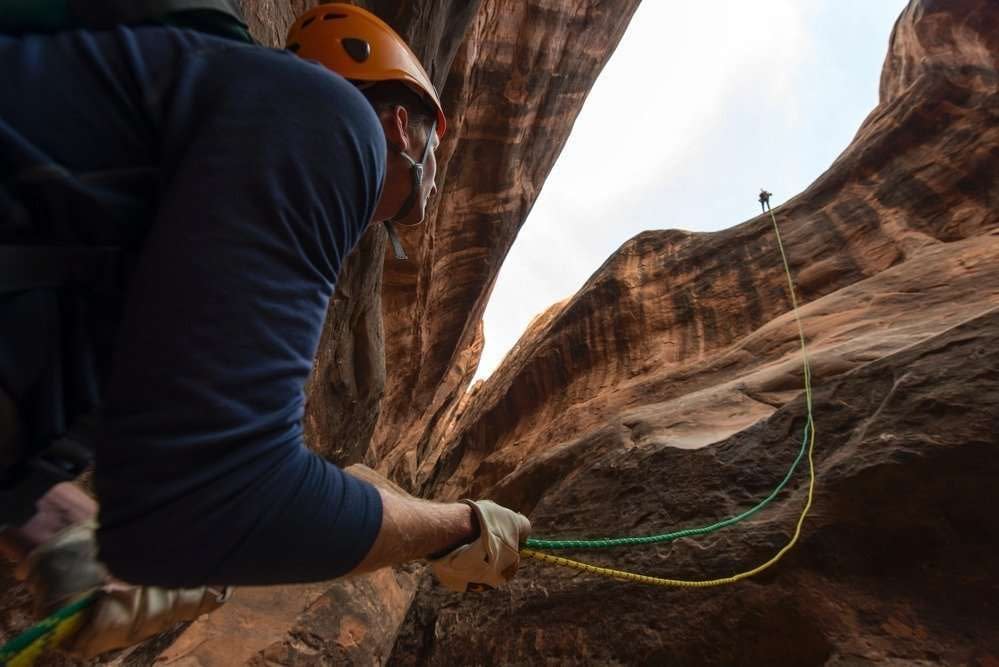
The belayer at the bottom holds the rappel rope(s) while standing close to, but not directly under the rappeller’s fall line. If at any point the rappeller loses control, the belayer can simply pull the ropes tight and lock the rope at the rappeller’s belay device arresting a fall.
I see fireman’s belays performed frequently and most times they’re not done properly. A proper fireman’s belay requires that the belayer is under the rappeler so the angle of pull on the rope will lock the belay device. The belayer should also be in a protected position to avoid rockfall. This may be accomplished by stepping a foot or two to the side or back from the fall line. As rocks and debris often fall during a rappel, the belayer must have a helmet on and stay attentive throughout the rappel.
The rope should be loose enough to allow the rappeller to control her movement, but tight enough that a good tug on the rope from the belayer would lock the belay device. It’s easier to lock the rope tight if the belayer is standing and has her arms extended out so there’s more room to take in slack.
Read more about why I always wear my helmet while climbing or rappelling.
The belayer should be ready to pull down on the rope at a moment’s notice as accidents can happen very quickly.
Safety check the system before rappelling
Now that you’ve got the rappel rigged properly with a backup in place, it’s time to check the system before you launch off. Ideally, you’ll do a partner check, but often when rappelling you’re the only one at the rappel station so performing a self-check becomes necessary.
Never skip the safety check step as it’s too easy to get complacent and forget a step. Too many accidents could have been avoided had a team done a simple safety check.
I like to use the acronym CHECK for my safety check.
C – Clothing
Ensure your clothing isn’t loose and liable to get stuck in a belay device or get in your way while you’re rappelling. Hoodie strings, sleeves, shirttails, or necklaces can all get sucked into belay devices, and while on rappel, that spells trouble. Tuck them in, tie them off, or take them off before rappelling. If you have a backpack, clip it to a sling from your harness and hang it between your legs for the rappel. If you’re too topheavy, you risk flipping upsidedown.
H – Helmet, Harness, Hands, Hair (that’s a lot of H words!)
Check your helmet to ensure it’s on and fastened. Ensure your harness is on correctly including doubled back if it needs to be. Check your hands. Did you put on your rappelling gloves? Check your hair. Long hair can get stuck in a belay device. Tie it back.
E – Environment
Check the environment for things like excess noise, wind, sun exposure, weather threats, animals, other climbing groups, etc. I like to take a final inventory of my gear to ensure I’m not leaving anything behind. This one covers a general risk assessment of anything that could interfere with a safe rappel.
C – Connections
Check all your carabiners or other connections to ensure they’re locked, not cross-loaded, or otherwise at risk of not working properly.
K – Knots
Check all the knots in the system including the prusik and anchor knots.
When running through the CHECK process, partners should check each other. It’s easy for people to get complacent and not check that the rope from the belay device goes properly through the carabiner. That’s when bad stuff happens!
Other safety skills you’ll want to learn as you get some experience with the basics are listed here but I won’t cover them in detail in this article.
- Passing a knot
- Ascending and load transfer
- Rigging a releasable rappel
After you’ve completed a thorough safety check, it’s time to test the system.
Test the rappel system
At this point, you should still be safely tethered to the anchor with your personal protection. With this connection, you can safely test the rappel rigging to see if you overlooked anything. Do this by choking your belay device as close to the anchor as you can and fully weighting the rappel rope. Let the rappel rope slide through the belay device freely until the prusik locks tight.
If everything is rigged properly, you should be able to weight the rappel rope, the anchor, your harness, and the prusik all without any issue and you’re ready to go live.
Beginning the rappel
If you have a fireman belay, call out “On belay?” and wait for the response “Belay on!”. Once confirmed that you’re on belay, you can safely remove your personal protection. Be sure to keep one hand firmly holding the brake strand throughout the rappel start.
Once your protection is removed and you’re in position to rappel, call out “On rappel”. I have a habit of doing this vocally even when I’m rappelling alone. It’s just part of my routine now.
Learn more about climbing commands in this article: Belaying: Everything A Beginner Needs To Know – Don’t Let Go Of The Rope!
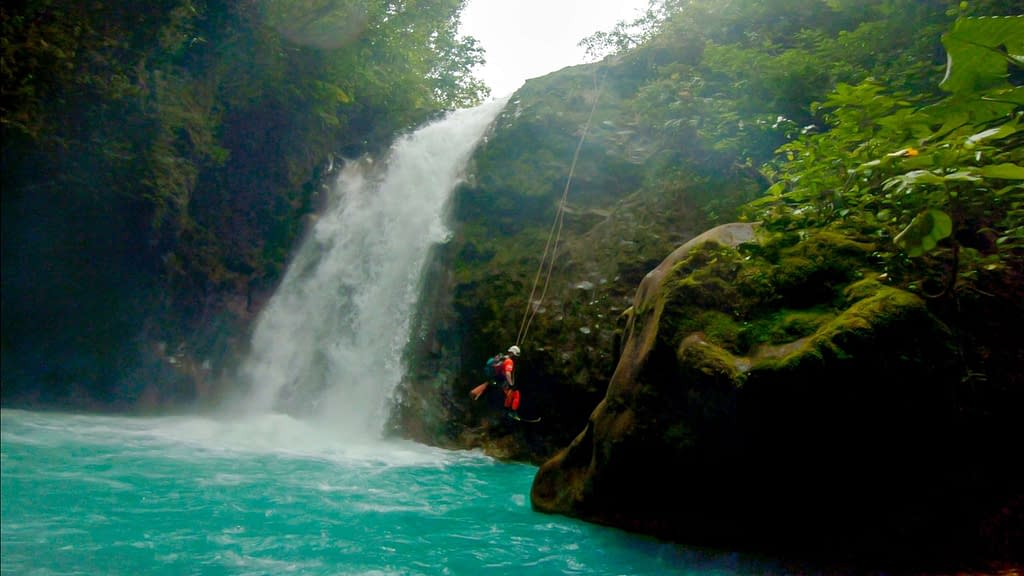
As you begin the rappel, sit back into the harness and gradually walk back toward the edge of the cliff.
On rappel
Usually, the most exhilarating part of rappelling is the start. If you’re lucky and you have a good sloping start with a high anchor, it’s not at all challenging to just walk backward as you weight the harness keeping your feet shoulder-width apart.
Challenging starts
More often than not, you won’t have a perfect start to your rappel. Sometimes you’ll have anchors right on the edge of the cliff or even down on the face of the cliff. You may have an overhanging start. It’s not going to work to simply walk off the edge in these cases. Each scenario is different, but you can make any start easier by choking up as close to the anchor point as possible. This may require that you sit on your butt or downclimb a bit to get a stance on the face of the cliff. Just don’t let go of the brake strand!
If you’re facing an overhanging or sharp edge, sit on the edge and slowly roll on your hips until you’re hanging on the rope. This can be pretty awkward, so don’t expect to have a graceful start on every rappel.

Hard starts can also pose a risk to the anchor and the rope. As you drop over the edge, be watchful of what impact your movements will have on the rope and anchor system. Do what you can to avoid shock-loading the anchor or dropping the rope roughly onto a sharp edge. Move slowly and also keep an eye on your hands as it’s easy to pinch them between the rope and the rock.
Keep it smooth

Once you’re beyond the start and have a good rappelling stance, keep your eyes looking down so you can anticipate and avoid any obstacles along the rappel. Move steadily but smoothly down the wall. You may see people bounding down the wall in huge leaps, but this is terrible rappelling form. It adds unnecessary stress to the system and puts you in less control of your descent.
Be mindful of the friction on your rope. If you’re moving too fast, work to get the rope back further so it’s in line with the rappelling rope above you.
Adding friction
Wet or skinny ropes, especially on single-strand rappels, will require more friction, so plan for this in advance.
Read a trip report where I was on a wet, icy, single-rope rappel: Donut Falls Rappel – Trip Report
You can add more friction to your system with a couple of carabiners by clipping one to your belay loop and the other to the belay carabiner and running the brake strand through the belay loop biner and then through the carabiner hooked to the belay device carabiner. This can be done while on rappel if you have the carabiners handy.
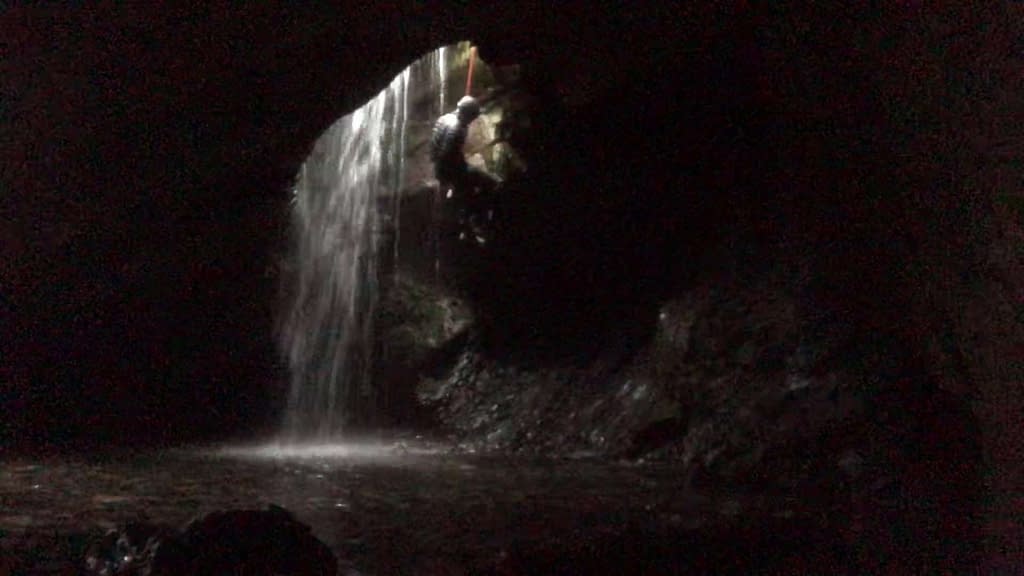
Watch for your landing
As you progress down the wall, keep an eye out for your landing spot. Whether on the ground or at the next belay station, you should be paying attention to where you want to end up. Watch for the ends of the rope so you don’t get hung up on the knots or land in an awkward place.
Once you reach your landing you can get stable footing under you if you’re on the ground or set up an anchor if you’re doing a multi-pitch. Once you’re secure, remove your prusik and the belay device from the rope and call out “Off rappel!” so the rest of the party knows what to do next.
A note on unclipping your rappel device either at the start or the end of a rappel. DO NOT DROP IT. It’s easy to let that little thing slip out of your hands and leave you hanging – er – unable to hang. If you find yourself in that predicament, you’ll be happy to know how to use the munter hitch.
So that’s the general sequence and process of rappelling. Of course, the myriad circumstances you find yourself needing to rappel will change this up a bit, but follow the principles outlined here and you’ll stay safe.
Here are a few additional considerations to help you make better decisions in various scenarios.
Teamwork
Vertical sports are, for the most part, team sports. Most of the time you’re with a partner or even a whole crew of people. There may be mixed experience in the group and varying levels of knowledge and skill. I frequently take beginners out climbing or canyoneering and learning how to work as a team so everyone gets up and down safely is paramount to continued success and fun.
Read: How to not die while canyoneering
The first rule of leading groups is, don’t take a group out unless the collective group has sufficient skill and experience to lead the entire group through the objective successfully. This typically means at least two people are proficient in everything we just discussed as well as all the other requisite skills for the adventure at hand such as outdoor navigation and wilderness first aid.
Sequencing
When a group is rappelling, the sequence of who rappels first and last is important to think through.
First person
The first person down will be “testing” the integrity of the anchor and the rope placement. This often means the larger people go first as those up top are able to back up the anchor if it’s at all questionable. The first person down also won’t have a fireman’s belay at the bottom so will need to use a prusik as a backup belay. The first person should have enough skill and experience to manage these challenges and to help others from below when they get there.
Middle people
The middle sequence of people isn’t hugely critical and each party may elect a different strategy for the middle folks.
Last person
The last person on rappel or if you’re a canyoneer, the LaPAR (Last Person At Risk), needs to have specific skills as well. If a person gets stuck on rappel for whatever reason, the last person, or someone still at the top, needs adequate skill to rescue the stuck rappeller. If releasable rigging is used, the last person needs to know how to operate the releasable system to lower the stuck rappeller. The munter mule is a good releasable system all rappellers should learn.
The LaPAR will need to be able to rerig the anchor to be retrievable if needed and will need to ensure the rope placement is ready for a clean pull from below. We’ll discuss pulling the rope in a minute, but basically, this person is the last chance to make any adjustments to the rope placement to ensure it doesn’t get stuck on the pull. The last person also needs to ensure no gear or trash is left behind at the rappel station (Always practice Leave No Trace!)
Additional thoughts on working with inexperienced teams
A good team works together quickly, and efficiently with everyone doing their part. As mentioned, oftentimes you’ll have beginners in your group. Here are a few tips to help beginners or veterans alike in certain situations.
Use releasable rigging
Releasable rigging should be used whenever possible and especially with anyone not proficient in performing self-rescue while on the rope. It takes a bit more skill and thought, but it really doesn’t take much more time if you plan on releasable rigging to begin with.
My preferred setup is the munter mule overhand, but many other options exist. The key is to learn one, practice it, and use it regularly.

Extend the belay device
Especially with those who haven’t spent much time dangling from a harness over the edge of a cliff, extending a belay device can make rappelling much more comfortable by preventing flipping upside down and prevent hair, clothing, or fingers from getting sucked into belay devices. It also makes it easier to create friction since you have more space to move the rope back behind the belay device. If you’re using a prusik, extended belays will also give you more wiggle room on the size of your prusik loop.
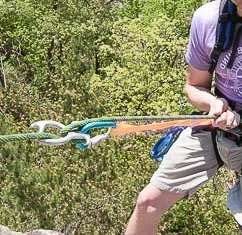
To extend the belay, you simply connect a sling, draw, or other fall-rated material to your harness belay loop or hardpoints and attach the carabiner and belay device to the extension. It’s essentially creating a new and bigger belay loop.
Read The extended rappel: learn this skill for safer, easier rappelling
Single vs double rope
So far we’ve discussed what a double-stranded belay looks like. A single-strand rappel is mostly the same with a few key differences. The first is that with only one strand of rope, you’ll have less friction. Plan for this accordingly.
The more important consideration for single rope rappels where you’ll be pulling the rope from the bottom. An unfortunately simple mistake to make is connecting your belay device to the wrong side of a retrievable rappel rope. One side is meant to be pulled from below and the other is meant to be rappelled on. If you confuse the two and clip into the wrong one, gravity will win. This mistake is easily avoided if you perform the CHECK process and the system test discussed earlier. It’s always better to take a few extra seconds to be safe than to rush and get injured or killed.

Pulling the rope
Once you get to the bottom of the rappel and the team is ready to proceed to the next waypoint, you’ll need to pull your rope. At this point, all the planning and preparation for a good rope pull should have already occurred.
Even before you built your anchor, you should have found a good placement for the anchor to give the rope an easy pull. This means the masterpoint of the anchor should be in direct sight of the ground if possible and shouldn’t have any obstructions to the pull.
While at least one person is still at the rappel station, I always like to have someone on the ground conduct a test pull to ensure there aren’t any issues that can be fixed by the person at the rap station.
If there are knots at the end of the rope, be sure to untie them before pulling the rope. Begin the pull and try to keep a good smooth motion on the rope to prevent it from sticking. Once the rope tail comes free of the anchor, you may need to give the rope a yank in a specific direction to keep it out of trees, or other obstacles.
Sometimes even with all these precautions, you’ll stick a rope. It happens. I won’t discuss all the options you have when you stick a rope here. If you have a stuck rope story, share it below for others to learn from.
Conclusion
Rappelling isn’t a skill you can master by reading this article. As with all skills, practice makes perfect. I recommend you take what you’ve learned here to a nearby playground or tree and practice the skills in a safe environment. Practice rigging an anchor and connecting your belay device. Practice checking the system and develop your own sequence and habits so that when you get out in the field where there are real risks and uncontrollable variables, your skills will be sharp and you’ll stay safe.

Until next time…
Safe, smart, and confident adventures to you.
-Chris



That’s a good point that if your rope gets tangled up, that it will waste time when you are trying to rappel. I feel like keeping it wrapped up and organized would be a good way to make sure that there are no knots or tangles in it. If I decide to get into rappelling, I’ll have to get a spool or tube to wrap my rope around so it stays neat.
The most common way to do this is by the saddlebag method or using a rope stuff sack. You may try to use a spool or tube, but you could easily put twists in your rope if you coil it wrong and that will lead to a big mess.